20 Cheerful DIY Easter Crafts for Kids That Will Brighten Up Your Home
The following post may contain Amazon affiliate links. As an Amazon Associate, I earn a small commission from qualifying purchases made through links on this post. This post may contain AI-generated images. These AI-generated images are intended for illustrative purposes only and do not represent actual products or services.

Spring is in the air, and that means Easter is just around the corner! Whether you’re looking for kid-friendly crafts, festive decorations to brighten up your home, or simple handmade gifts for friends and family – this post has you covered!
The best part? You don’t need to be an expert crafter to make these adorable DIY projects! This list is filled with super simple projects that require minimal supplies and effort—but deliver maximum cuteness! So grab your glue gun, paintbrushes, & some pastel paints, and let’s hop into the Easter spirit with these 25 super easy DIY Easter crafts!
PS: Make sure to always supervise your kids when doing these crafts!
- 1. Painted Easter Eggs
- 2. Paper Plate Easter Basket
- 3. Toilet Paper Roll Bunnies
- 4. Washi-Tape Easter Eggs
- 5. DIY Bunny Ear Headbands
- 6. Cupcake Liner Chicks
- 7. Marbled Easter Eggs
- 8. Spring Floral Centerpieces
- 9. Easter Mason Jar Lanterns
- 10. Glitter-Dipped Easter Eggs
- 11. Simple Easter Wreath
- 12. Decoupage Easter Eggs
- 13. Paper Bunny Bunting
- 14. Cotton Ball Bunny
- 15. Puffy Paint Easter Windowclings
- 16. Handprint Bunny Art
- 17. Egg Carton Bunny
- 18. Pom Pom Bunny Garland
- 19. Popsicle Stick Chicks
- 20. Easter Sock Bunnies
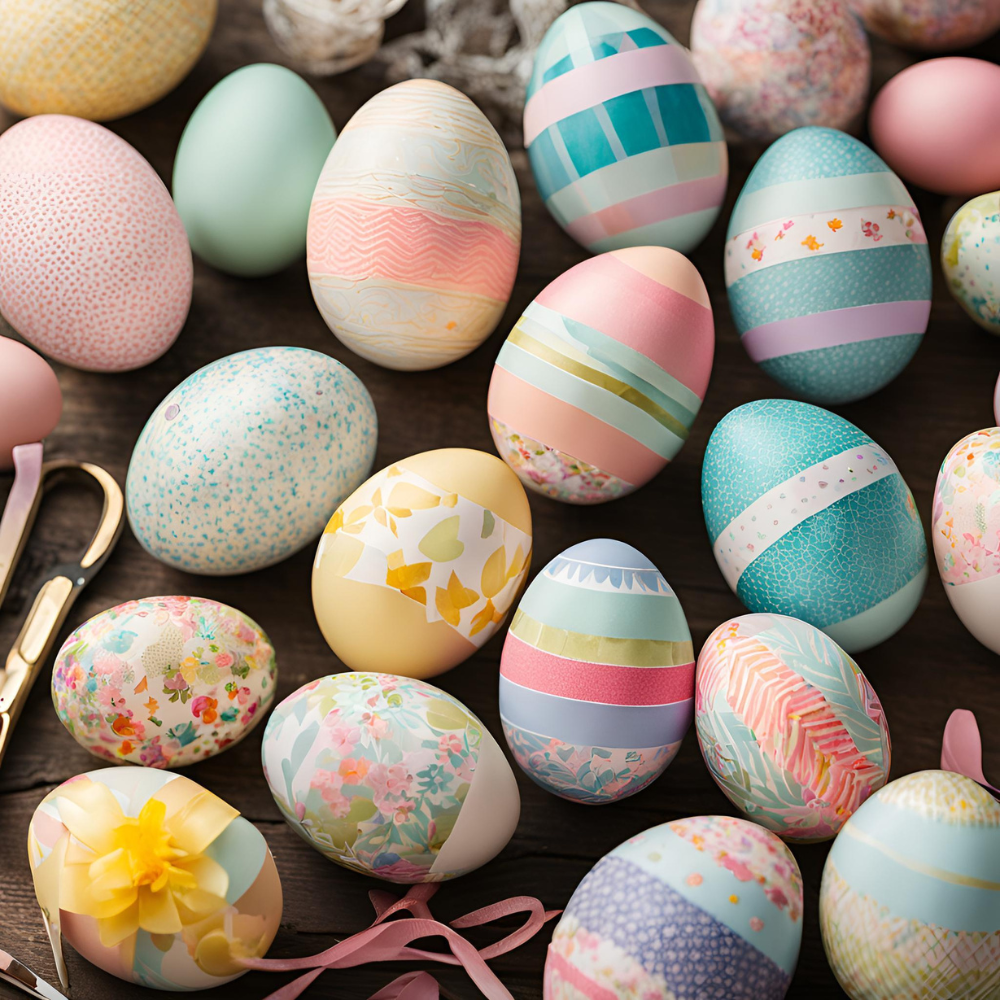
1. Painted Easter Eggs
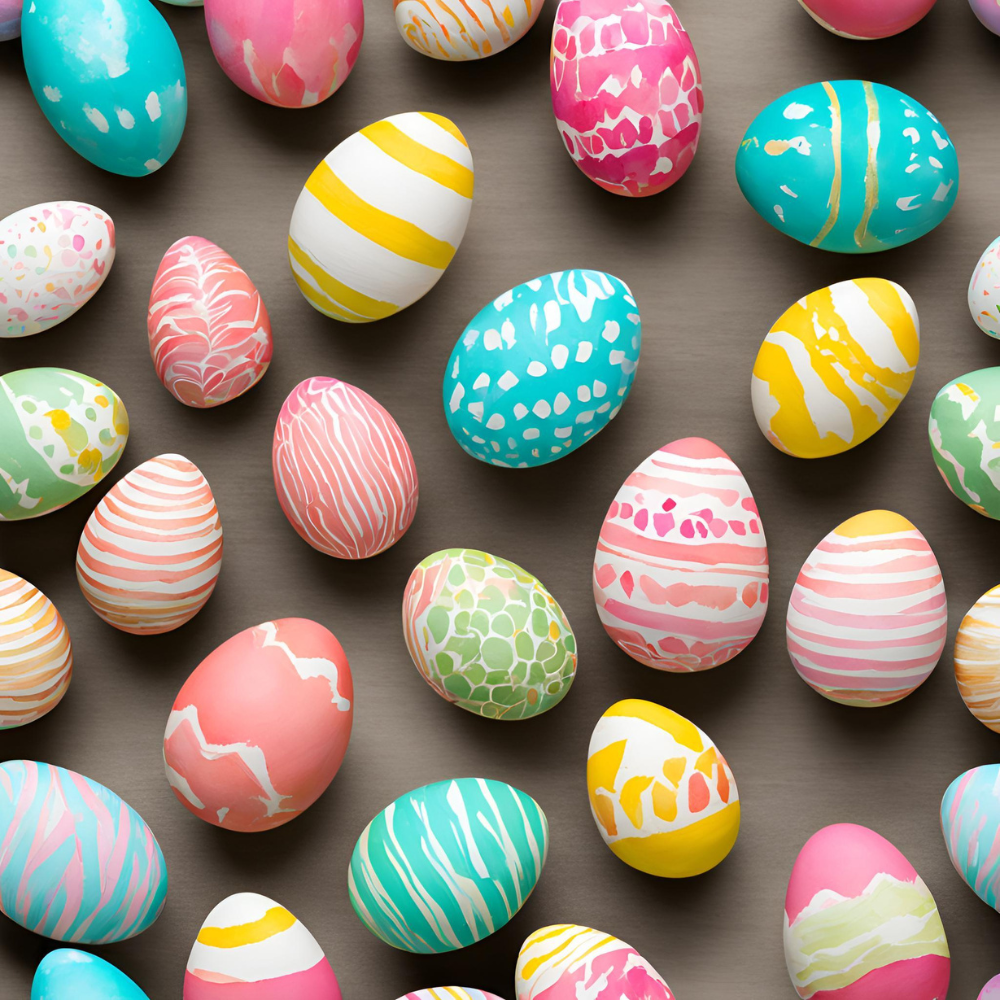
This craft is super simple, kid-friendly, & will fit in perfectly with your Easter home decor! Add cool patterns like stripes, dots, & more to give your eggs a unique twist. Or you can get creative & try your hand at painting intricate designs! Feature them in a decorative basket or add them to other spring decor around the house.
Materials:
- Hard-boiled eggs or artificial wooden eggs
- Acrylic paint in pastel colors
- Paintbrushes
- Water cup
- Paper towel
Instructions:
- Boil and cool your eggs
- Use a paintbrush to paint the eggs using the acrylic paint. You can paint your eggs a solid shade or add designs like stripes, dots, flowers, swirls, etc.
- Let them dry completely before handling & adding them to your home decor or Easter basket!


2. Paper Plate Easter Basket
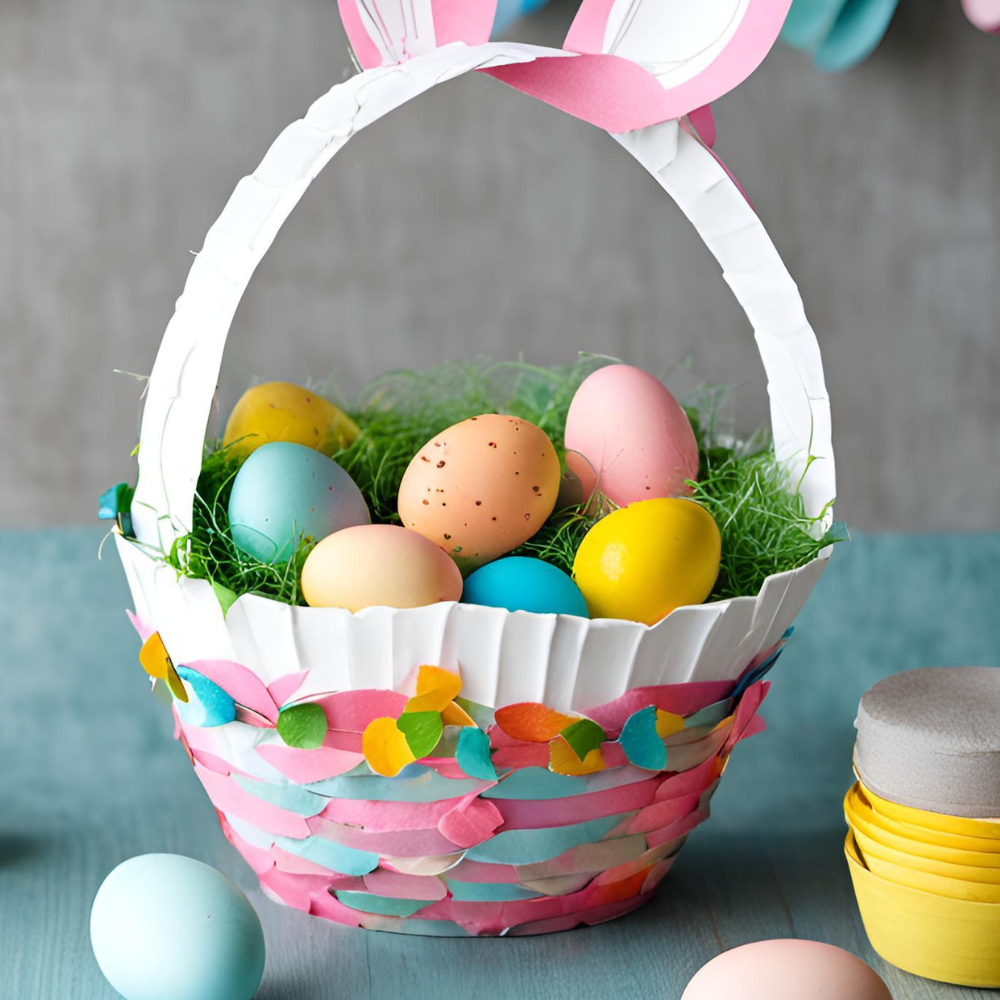
Repurpose paper plates into this handy little Easter basket! Kids can use them for Easter egg hunting, or you can use them just for decoration around the house.
Materials:
- Paper plate
- Markers or paint
- Scissors
- Stapler or glue
Instructions:
- Cut a paper plate in half. Also cut a strip from another paper plate for the handle
- Decorate both halves of the paper plate with Easter-themed colors, patterns, or stickers
- Staple or glue the halves together along the curved edge, leaving the top open
- Staple the basket handle to each side of the basket
- Fill with candy, eggs, fake moss, small treats, etc

3. Toilet Paper Roll Bunnies
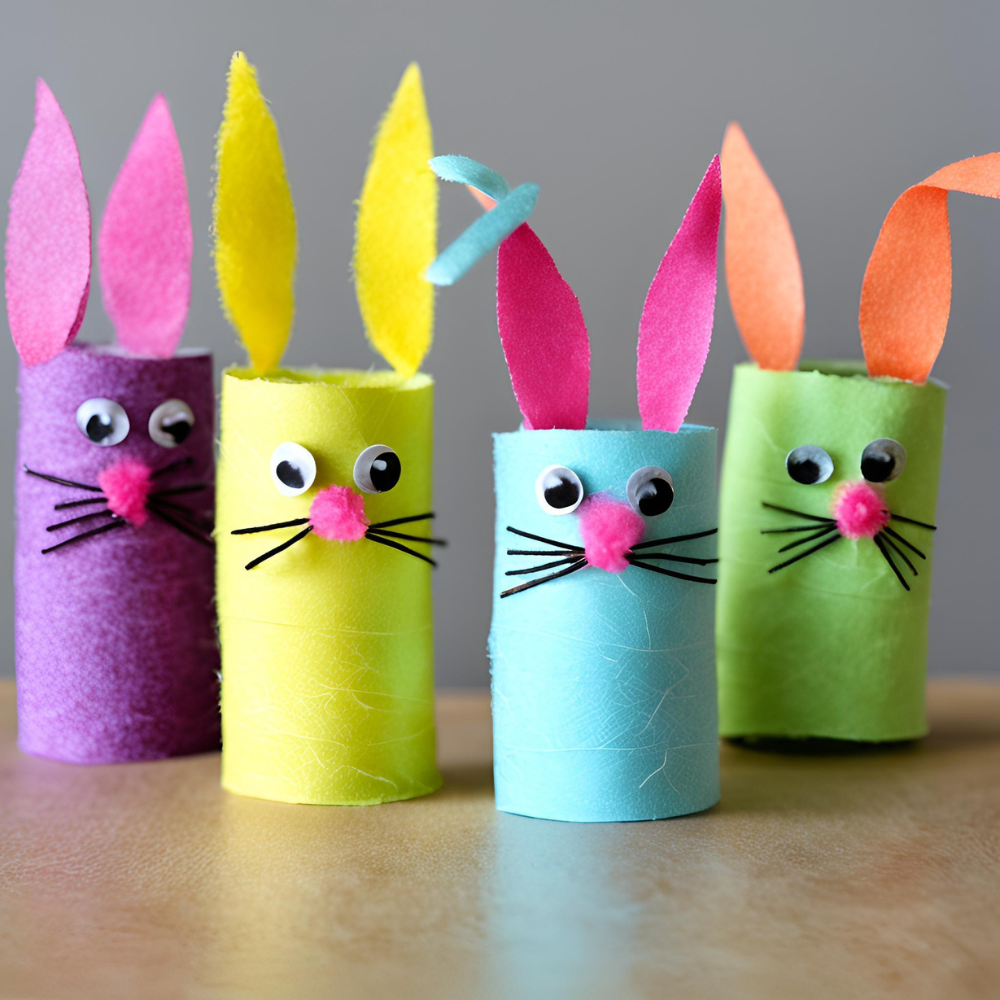
Recycle used toilet paper rolls into these adorable bunnies! This is an easy weekend craft you can do with the kids, and they are sure to have a blast making these little bunnies to show off in their room!
Materials:
- Toilet paper rolls
- Felt sheets in pastel colors
- Googly eyes
- Pom-poms – you can use buttons instead if you wish
- Pipe cleaners
- Hot glue gun
Instructions:
- Cut out a large strip of felt paper and wrap it around the toilet paper roll. Alternatively, you could also paint the toilet paper roll or just leave it bare instead if you want
- Cut bunny-ear shapes out of the felt sheets and glue or staple them on inside of the toilet paper roll
- Glue on googly eyes onto the toilet paper roll
- Next, make the nose & whiskers. Cut the pipe cleaners into your desired whisker length – you want to use about 6-8 pipe cleaners per bunny. Glue the pipe cleaners onto the Pom-pom, about 3-4 on each side (or button if you’re using this instead of the Pom-Pom)
- Glue the Pom-pom or button onto the toilet paper roll


4. Washi-Tape Easter Eggs
Make pretty decorative Easter eggs that are mess-free! Use Washi tape to add gorgeous, intricate designs to your Easter eggs. Another fun & easy kid-friendly activity!
Materials:
- Hard-boiled eggs or artificial wooden eggs
- Washi-tape in various colors & patterns
- Scissors
Instructions:
- Cut small strips of washi-tape
- Stick them onto the eggs in patterns or layers
- Press firmly so the edges stay in place


5. DIY Bunny Ear Headbands
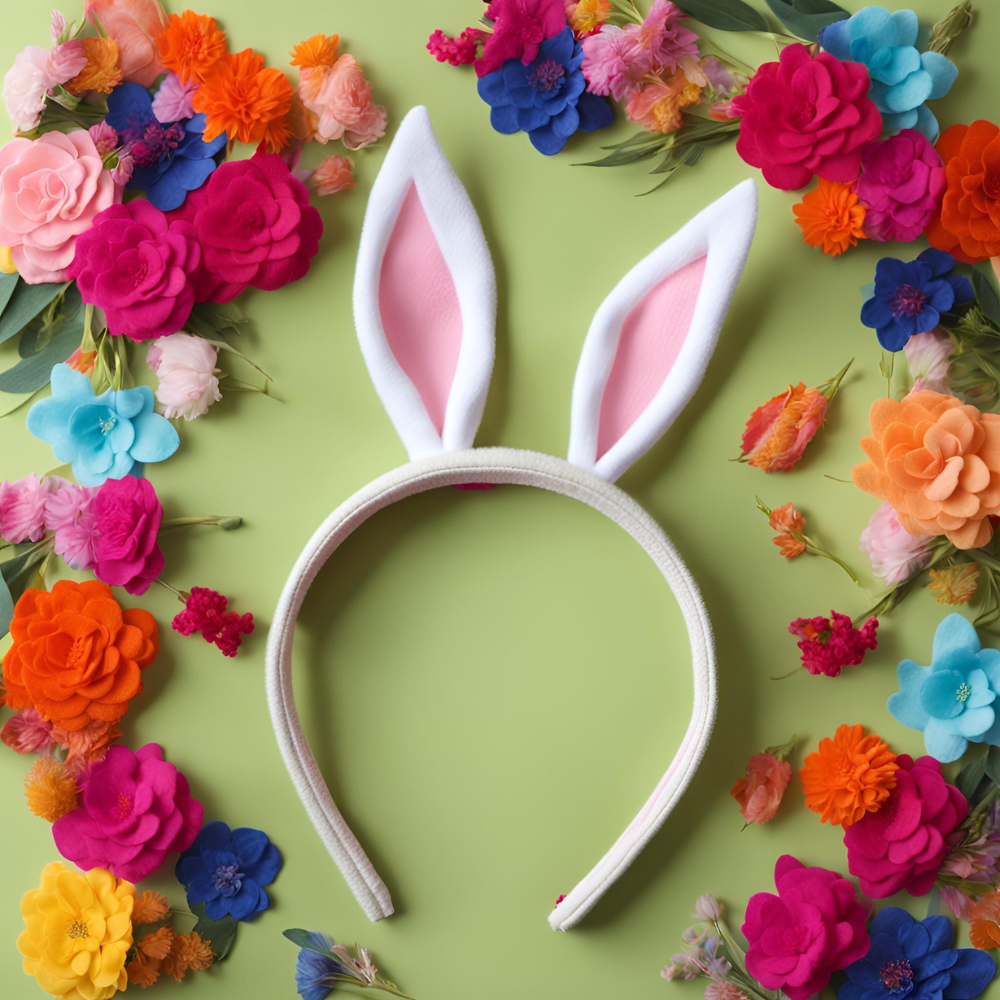
Bunny headbands look super cute for Easter festivities! Your kids can wear these adorable bunny headbands during Easter egg hunts or an Easter-themed party!
Materials:
- Fabric-lined padded headband
- Felt sheets in white & pink
- Hot glue
- Scissors
Instructions:
- Cut two bunny ear shapes from the white felt sheets
- Cut two smaller pink felt pieces for the inner ears
- Glue the pink felt onto the larger ear pieces as pictured above
- Glue or sew the ears onto the headband

6. Cupcake Liner Chicks
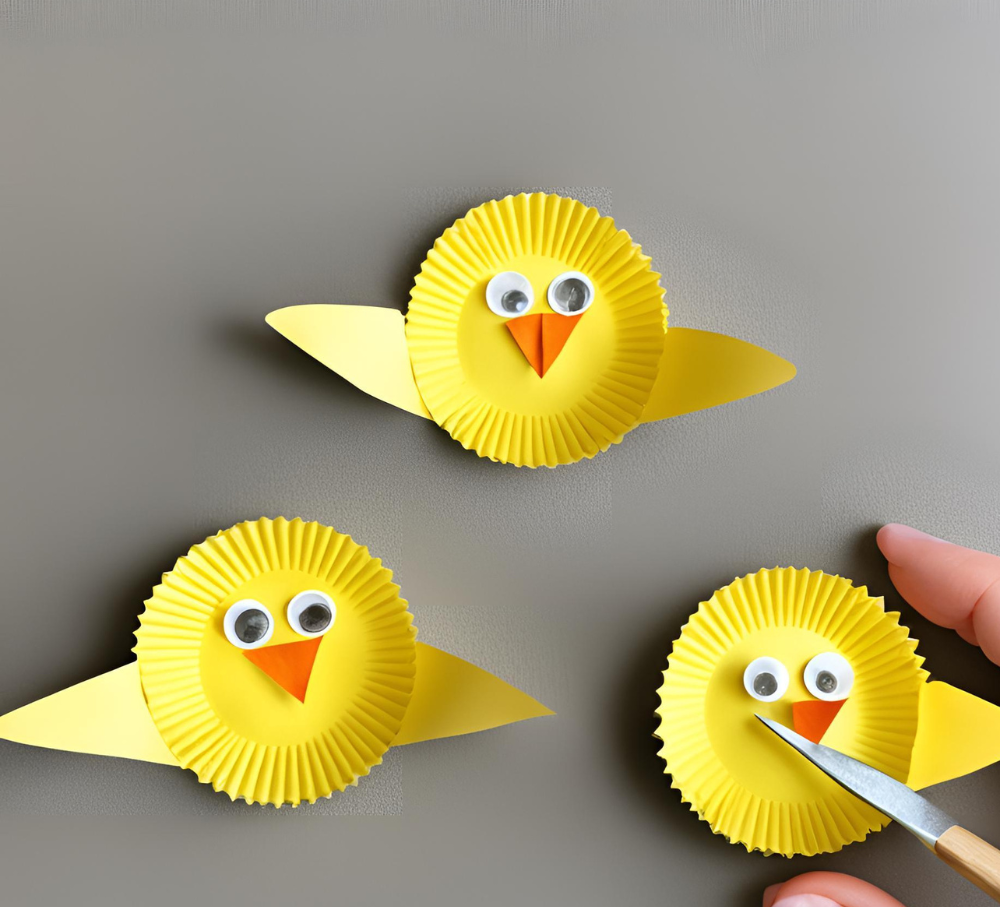
These cupcake liner chicks are so stinking adorable! You can also attach a string to the back to hang up these cute little chicks anywhere you please!
Materials:
- Yellow cupcake liners
- Yellow and orange construction paper
- Googly eyes
- Scissors
- Glue
Instructions:
- Flatten a yellow cupcake liner to create the chick’s body.
- Cut out a small triangle from the orange construction paper for the beak. You can also cut out two small triangles for the feet if you want (not pictured above)
- Cut out 2 small triangles from the yellow construction paper for the wings
- Glue the wings, beak, and googly eyes onto the cupcake liner
- Let dry, then display your adorable chick!


7. Marbled Easter Eggs
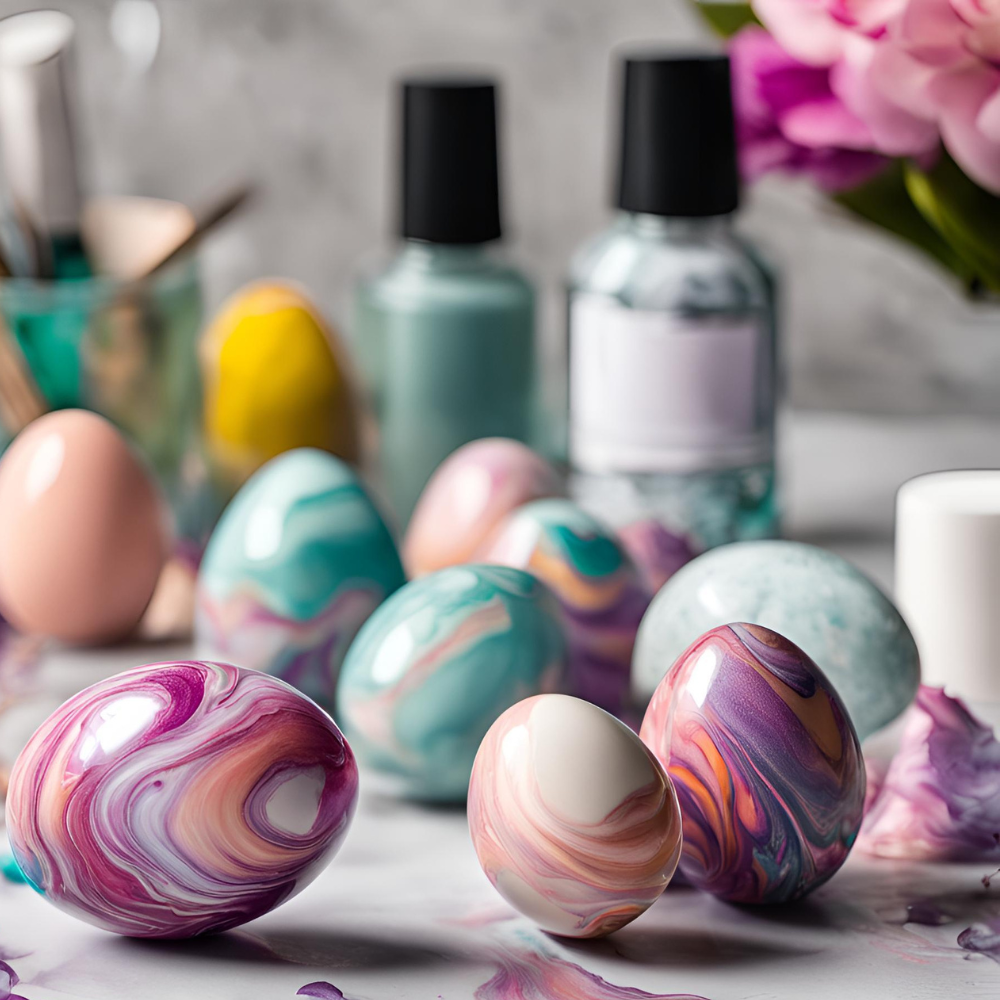
Create these beautiful, luxurious marbled Easter eggs using nail polish that you have at home! I love using glitter or shimmery nail polish to give the eggs a nice sheen & sparkle.
Materials:
- Hard-boiled eggs or artificial wooden eggs
- Nail polish in various colors
- Bowl of water
- Toothpick
Instructions:
- Fill a bowl with room-temperature water
- Add a few drops of different-colored nail polishes to the bowl of water
- Swirl the colors lightly with a toothpick
- Dip an egg into the water, rolling it to pick up the design. Use a spoon to make dipping the egg easier!
- Let it dry on a paper towel
8. Spring Floral Centerpieces
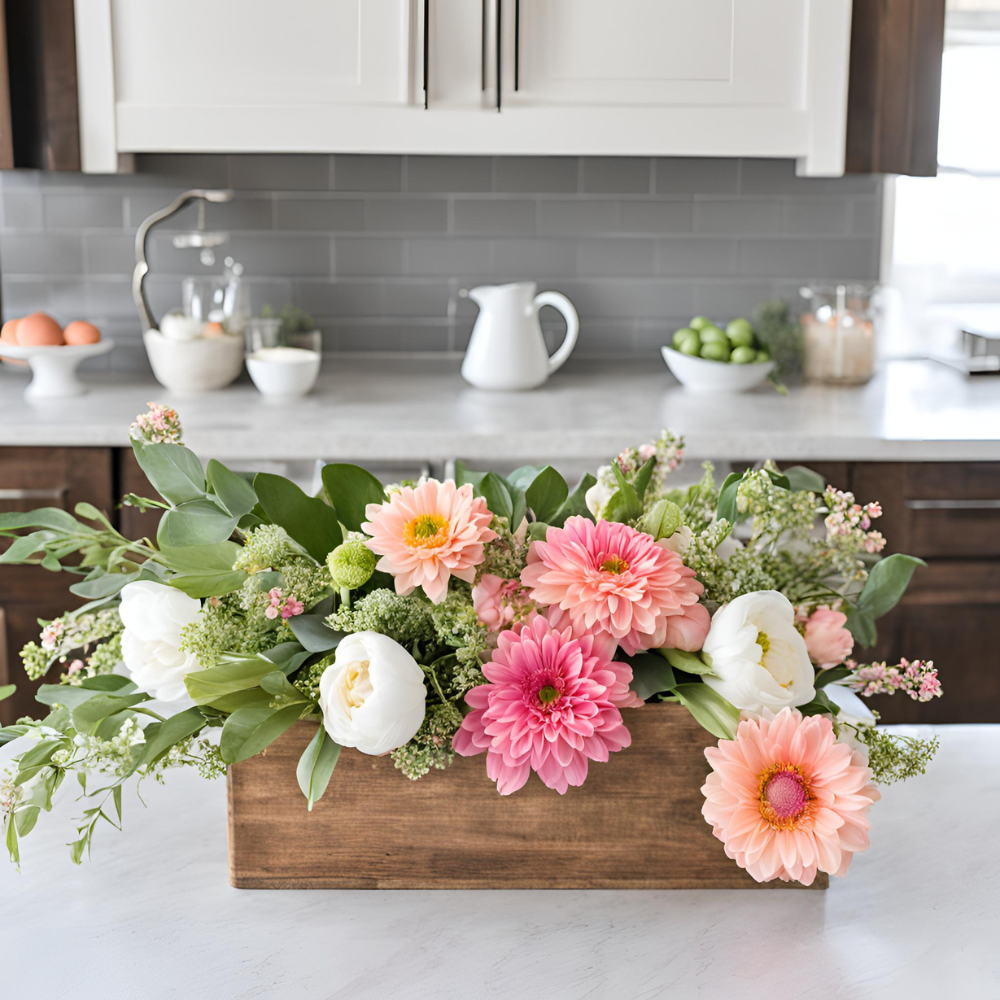
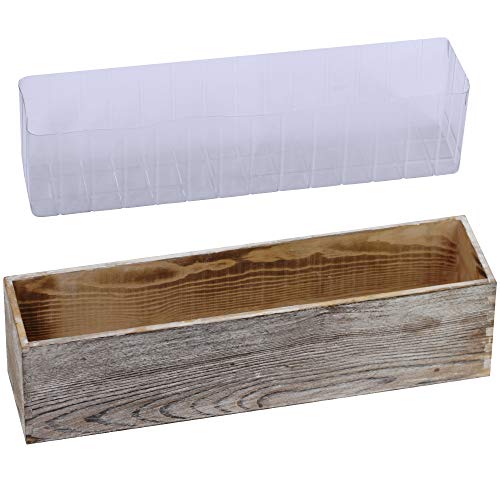
This is another simple way to use florals to make a beautiful centerpiece for your mantle, dining table, entryway, or coffee table. Get creative and repurpose any container you have at home into a beautiful vase – you can use a wooden box like above, Mason jars, an old vase, empty cans, etc. I personally love using a wooden rectangular box because it looks rustic & earthy for the spring!
Materials:
- Vase or any empty container – get creative & use things like Mason jars, wooden boxes, empty cans, etc.
- Artificial or fresh flowers
- Floral foam block ( optional )
- Ribbon ( optional )
Instructions:
- Prepare & add a foam block to the bottom of your container if you’re using one
- Arrange your artificial or fresh flowers in the container, or place them in the floral foam block
- Add a ribbon to your container, if desired

9. Easter Mason Jar Lanterns
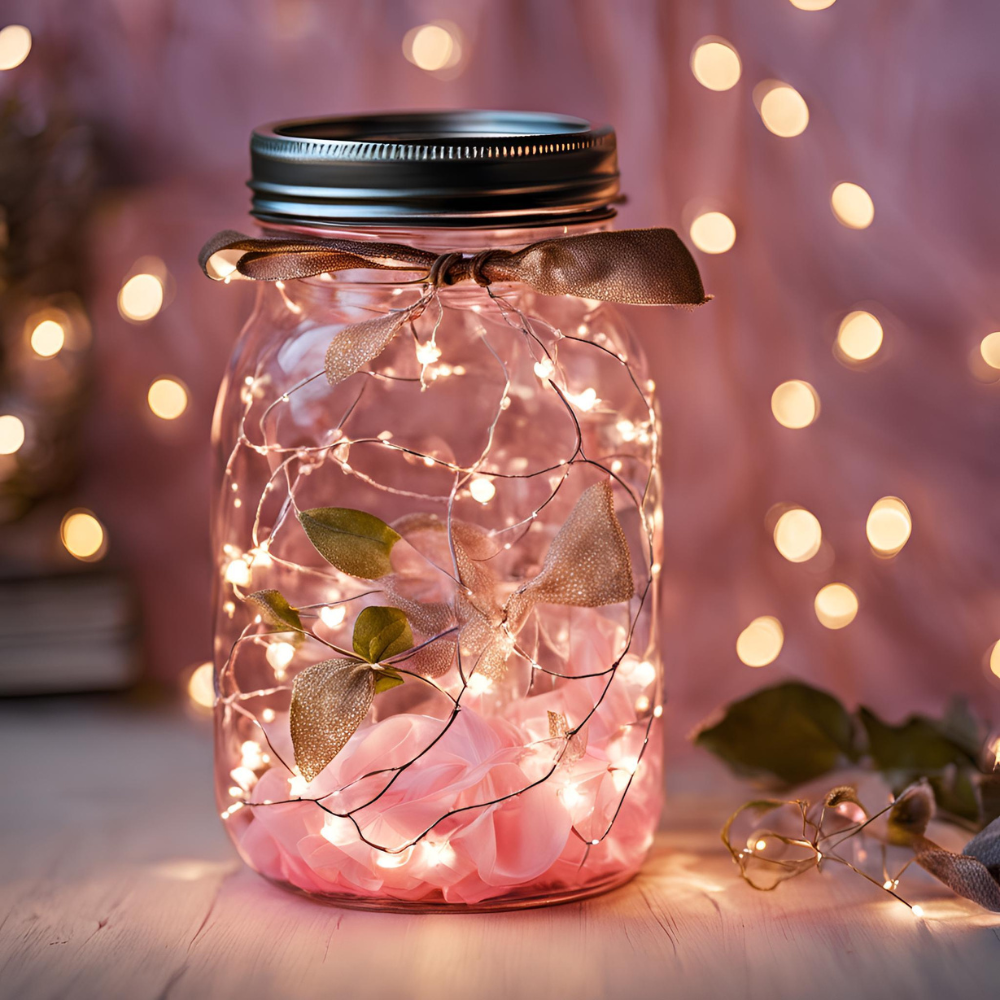
Make your space dreamy with this fairy light mason jar! You can hide the battery pack of the fairy lights by adding pastel tissue paper, tulle fabric, lace, or ribbon to the bottom of the jar!
Materials:
- Mason jars
- Fairy lights – get those that are battery operated or solar-powered and about 12-24ft in length
- Tissue paper, ribbon, tulle fabric, or lace for bottom of the jar
- Ribbon
Instructions:
- Place tissue paper, ribbon, fabric, or lace in the bottom of the jar
- Add fairy lights to the mason jar. Nestle the battery pack inside the tissue paper so it’s hidden
- Tie a ribbon around the mason jar


10. Glitter-Dipped Easter Eggs
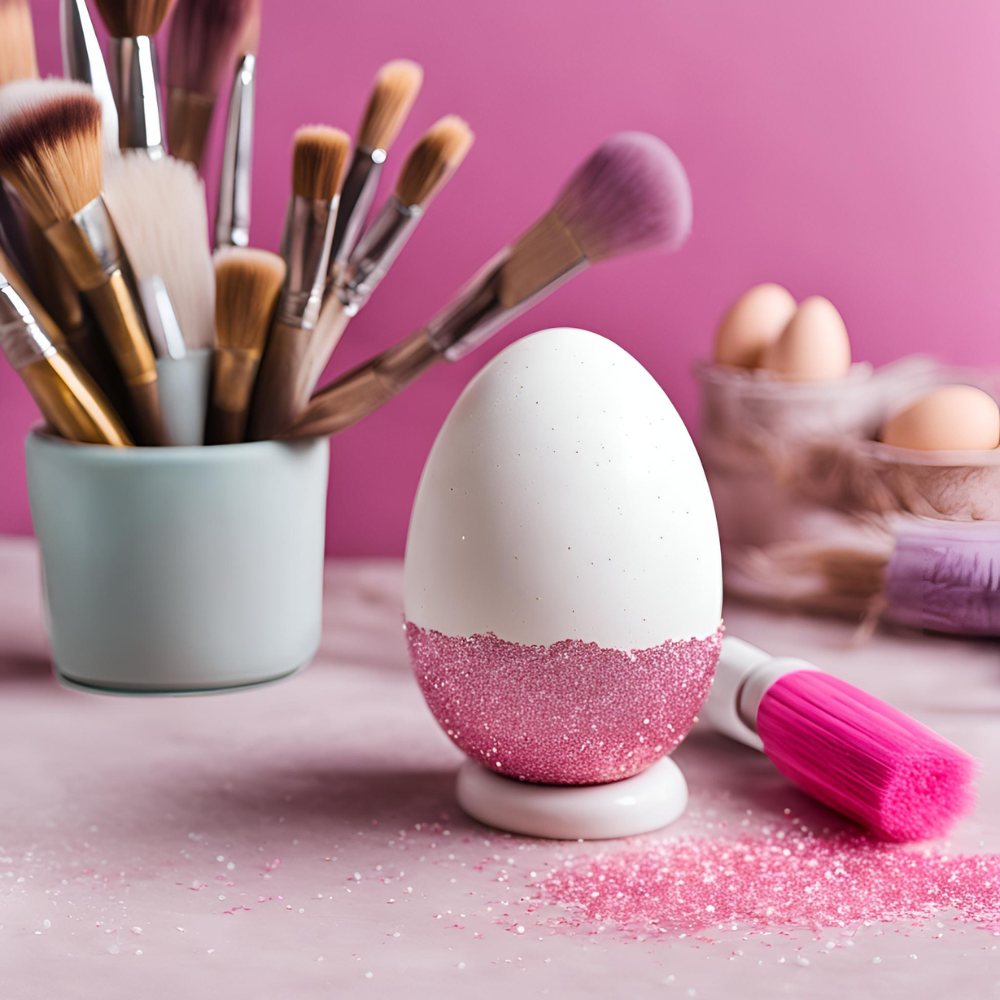
I love glitter on everything. So it’s no wonder that this is my favorite way to decorate Easter eggs! It’s so simple to make glitter-dipped eggs and they will undoubtedly look stunning as part of your spring home decor.
Materials:
- Hard-boiled eggs or artificial wooden eggs
- Glitter in various colors
- Glue
- Paintbrush
Instructions:
- Paint the bottom half of the egg with glue
- Sprinkle glitter over the bottom-half of the egg (the part that contains the glue). You can also add glitter a bowl and dip the bottom half of the egg into it to coat the bottom-half in glitter
- Alternatively, you can paint on glue using a paintbrush in a pattern such as stripes or polkadots. Then sprinkle glitter on the glued portion to create a sparkly pattern on your egg
- Let it dry before shaking off the excess glitter and adding to your decor!


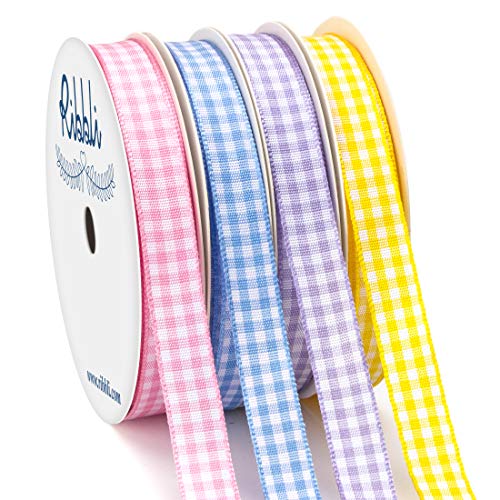
11. Simple Easter Wreath
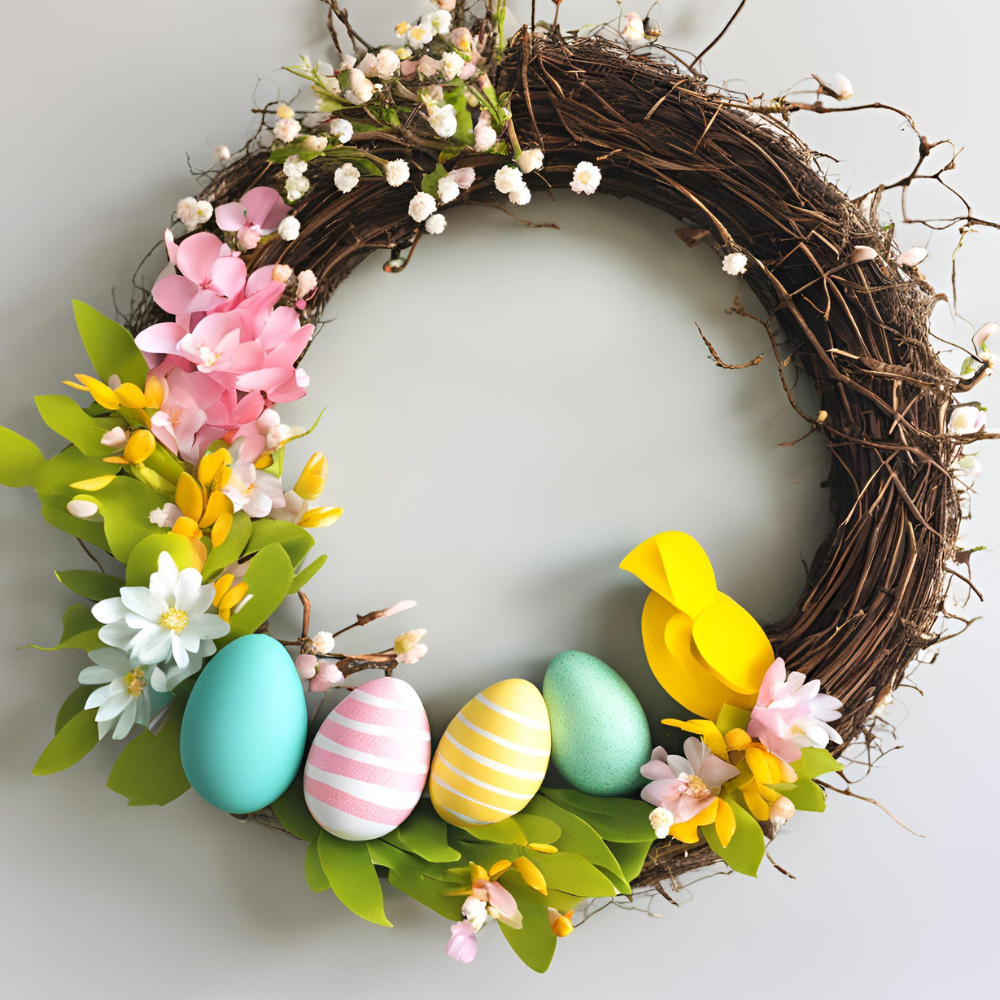
Don’t be intimidated – making your own wreath is actually quite simple! You can buy an affordable wreath from any crafts store (or check out my picks from Amazon below) and customize it as you wish by adding fake flowers, plastic decorative eggs, artificial leaves, paper crafts, berries, ribbons, etc.
Materials:
- Grapevine wreath
- Decorative elements – check out my Amazon suggestions below for ideas! but honestly I suggest going to a crafts store like JoAnn or Michael’s for the widest selection & cheaper prices!
- Hot glue gun
Instructions:
- Arrange your decorative elements around the wreath as you plan. Don’t glue them on yet!
- Once you’re happy with how your wreath looks, you can use your hot glue gun to fix them in place
- Hang on your door with ribbon or over-the-door hanger


12. Decoupage Easter Eggs
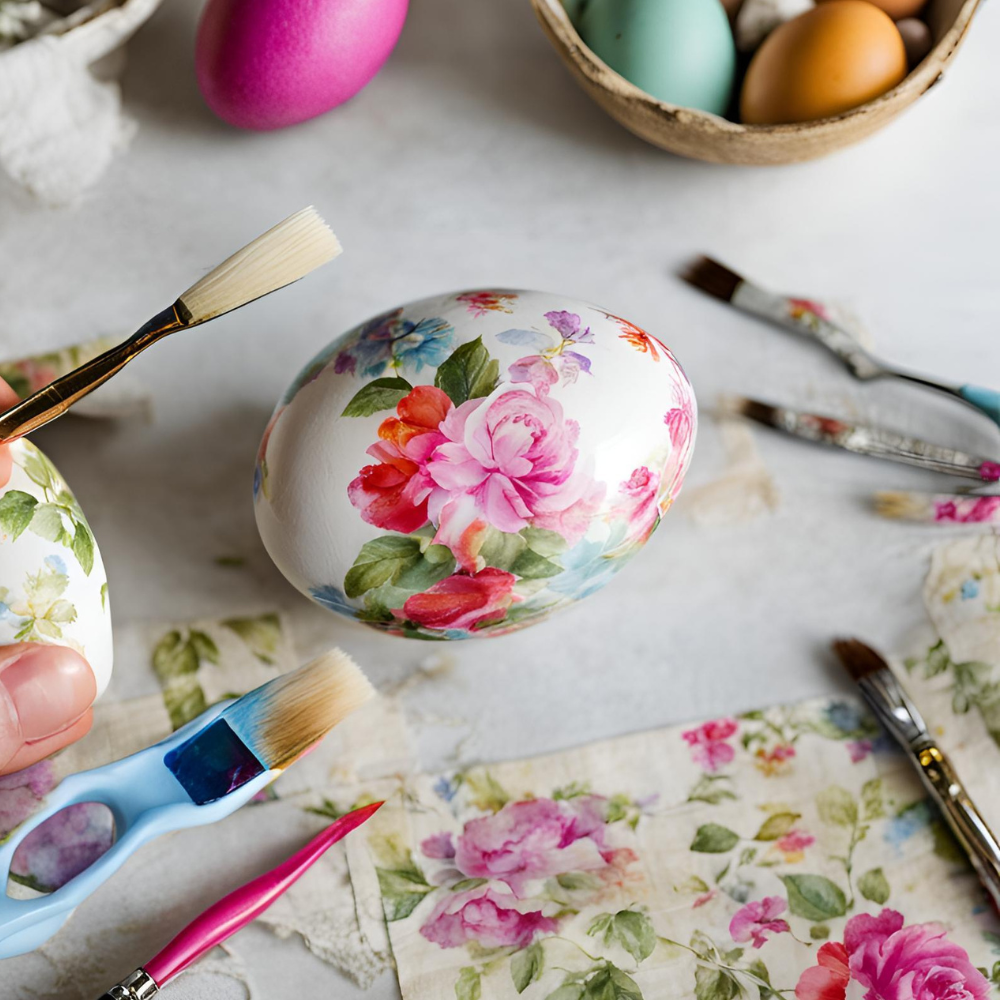
Recycle napkins & tissue paper with this super simple Easter egg craft! These eggs look so beautiful & unique and you can mix and match them to create a lovely decor centerpiece.
Materials:
- Hard-boiled eggs or artificial wooden eggs
- Mod Podge
- Napkins or tissue paper in various colors & prints
- Paintbrush
Instructions:
- Cut out small floral patterns or shapes from napkins or tissue paper
- Brush Mod Podge onto the egg
- Carefully press the paper onto the egg
- Seal with another layer of Mod Podge
- Let it dry completely.


13. Paper Bunny Bunting
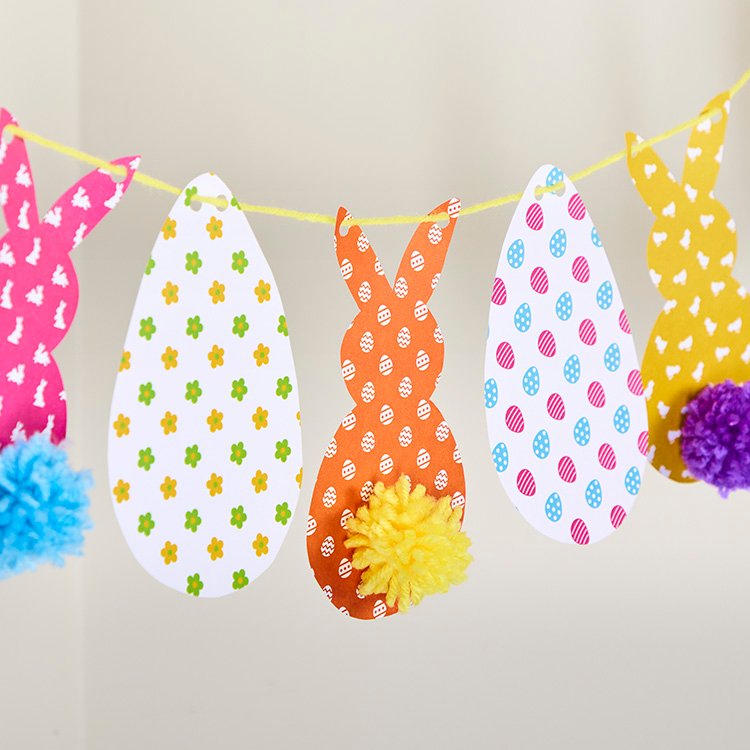
Image source: Baker Ross
Make this easy & fun Easter themed bunting that you can hangup in bedrooms, the living room, or any focal point in the home! This is also a perfect decoration for an Easter party!
14. Cotton Ball Bunny
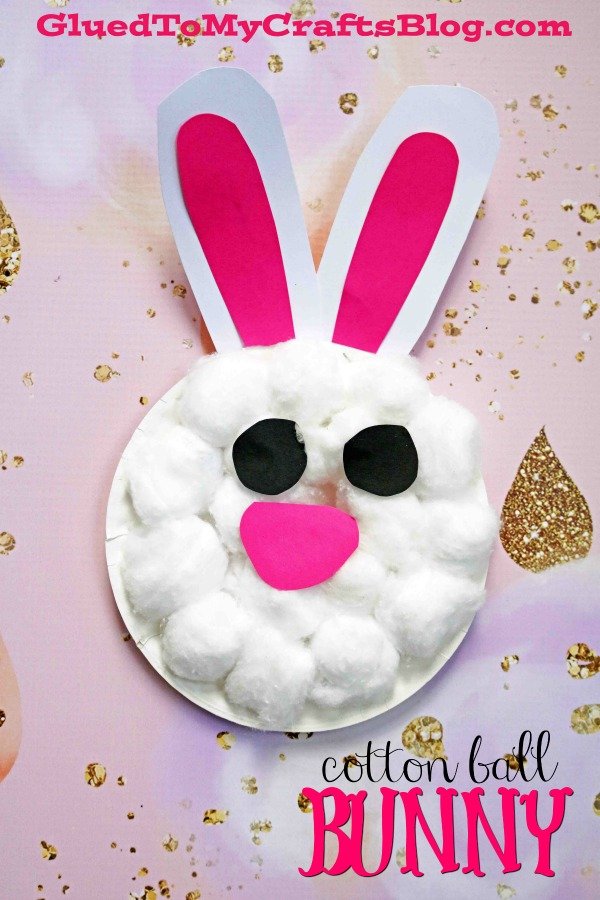
Image source: Glued To My Crafts
Turn cotton balls into a cute bunny with this super duper simple craft that your kids will love!
15. Puffy Paint Easter Windowclings
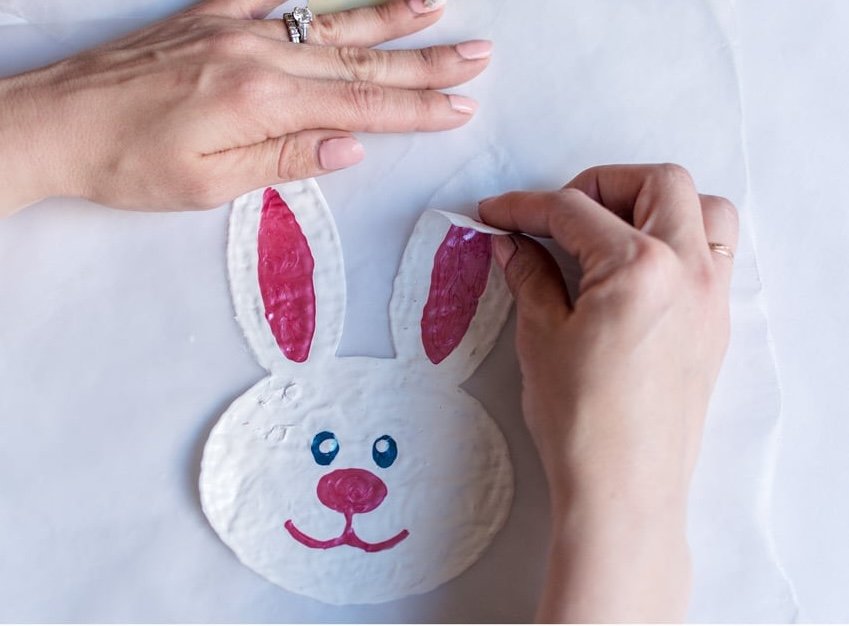
Image source: Posh In Progress
Kids are going to have a blast with this fun & festive DIY window clings using puffy paint!
16. Handprint Bunny Art
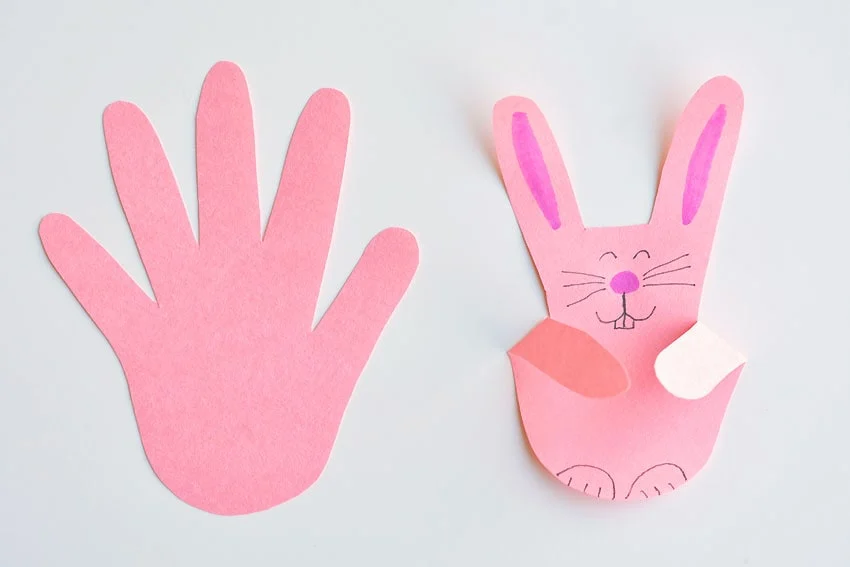
Image source: One Little Project
If you want a mega super easy crafting project to do with the kids this Easter, this one is it! This cute craft uses materials you likely have laying around the house – paper, marker, pen, scissors – that’s it!
17. Egg Carton Bunny
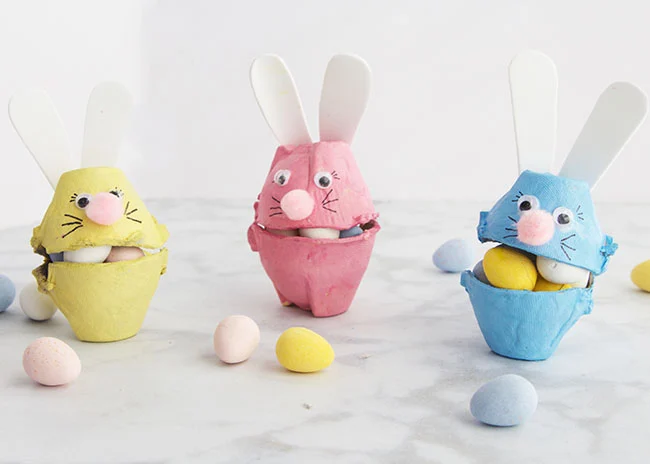
Image source: The Best Ideas For Kids
Check out this cool egg carton Easter bunnies – a weekend craft you can do with the whole family!
18. Pom Pom Bunny Garland
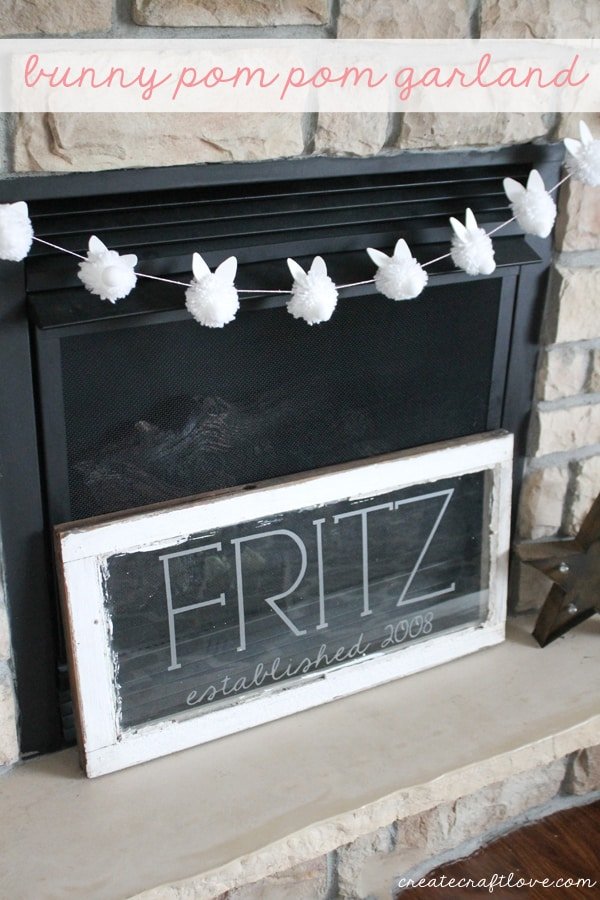
Image source: Create Craft Love
This is such a fun & cute craft from Create Craft Love! Hang up this cute bunny garland in kids’ room or even on your mantle!
19. Popsicle Stick Chicks
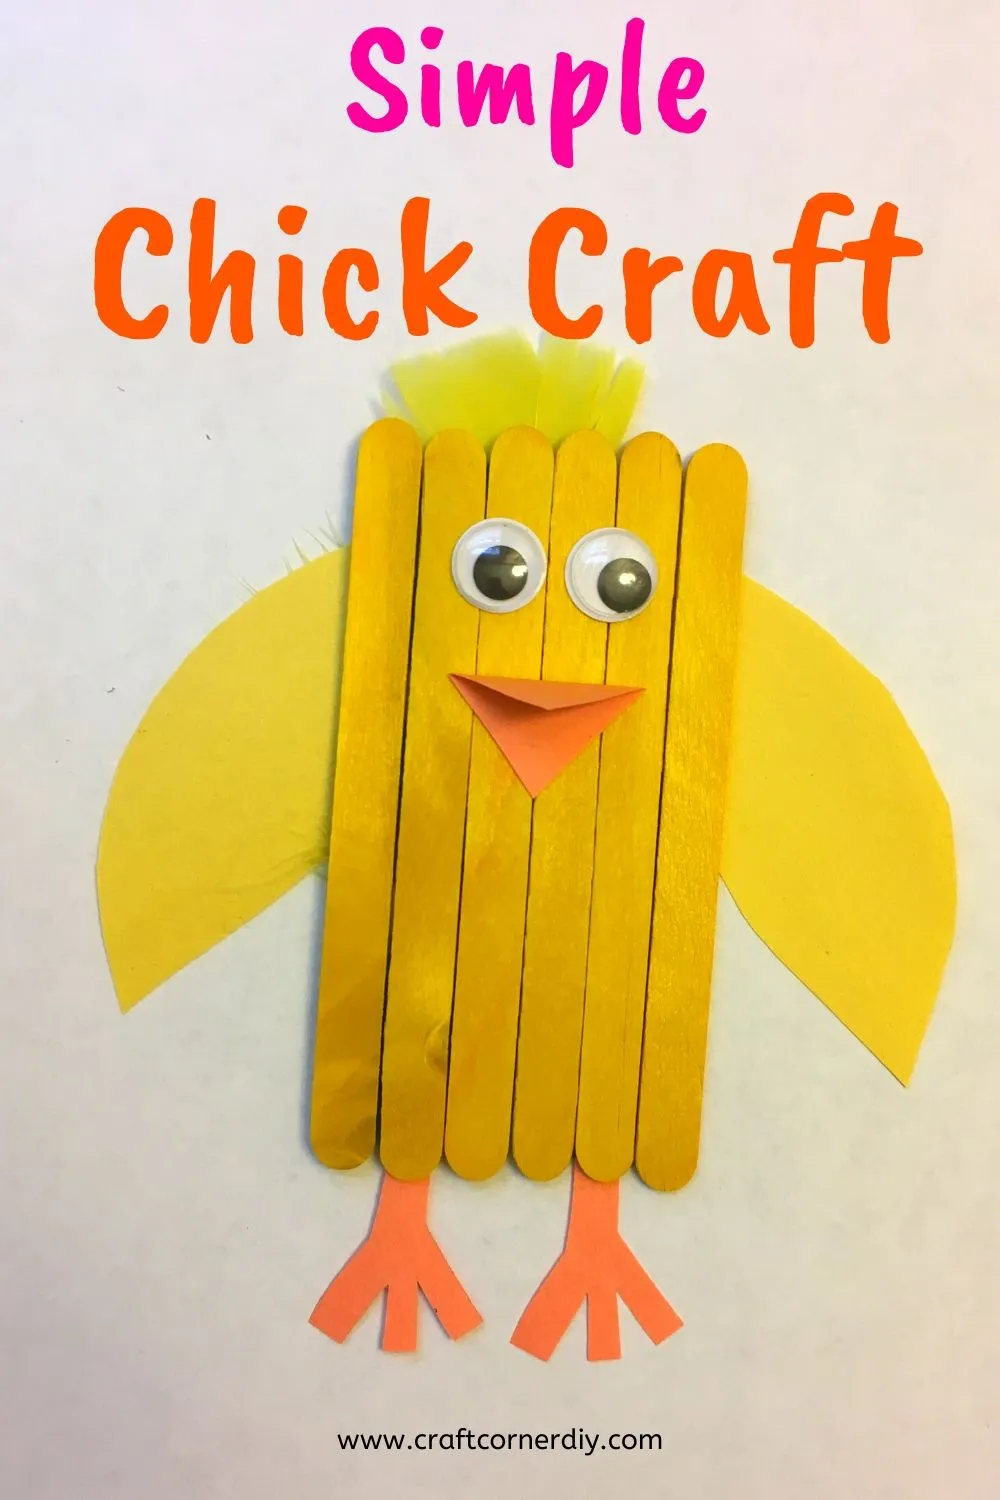
Image source: Craft Corner DIY
I squealed when I found this craft project because it looks so unique & so fun to make with kids!
20. Easter Sock Bunnies
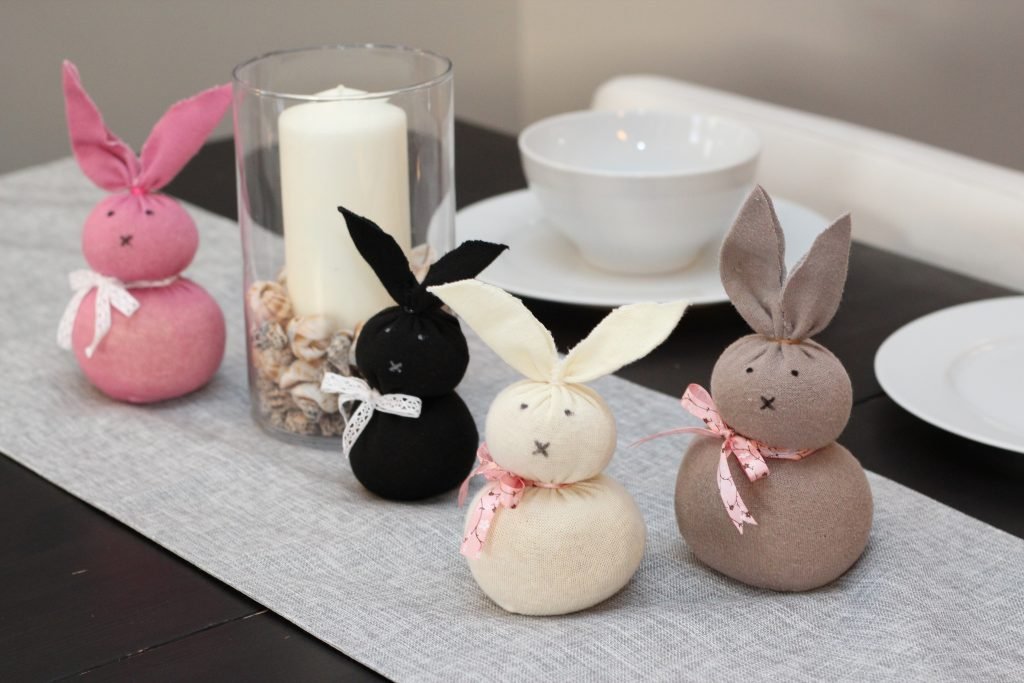
Image source: Feeling Nifty
I squealed when I found this craft project because it looks so unique & so fun to make with kids!
I hope you enjoyed these Easter crafts & hope you have a wonderful time making these with your friends, family, kids, or as a solo weekend activity! Which one was your favorite? Share in the comments below!